To climb vertical and near-vertical ice you have to be able to hold a lock-off position with each arm. The lock-off position is the one where you’ve pulled up and stepped up to where the tops of the tools are near your face. You loosen one of the tools (I try to make it the tool that is the most suspect/least solid), hold yourself with the opposite locked-off arm, and reach and swing the leading tool. This movement is also critical in mixed climbing and drytooling, where you have to hold a lock-off position, often for quite a while, while scratching and probing with the leading ice tool to find the best hook or placement. So your lock-off capacity is important, but how do you train it for ice climbing? Should you do lots of pull-ups?
While that certainly won’t hurt, the most effective way to train your lock-off strength is by doing lock-offs, which are a textbook isometric contraction. Fortunately we know quite a bit about isometric contractions. (Think of grip strength on the ice tool and hangboarding.) So the workout is going to be easy to derive.
Training Lock-Off Strength for Ice Climbing: The Warm-up and Workout
Lock-Off Warm-up
Warm up by completing 8–12 pull-ups. If you can’t do 8 pull-ups, that’s okay; use a toe on a chair or another method of taking weight off so you can complete 8. If you have a bouldering wall, do 5 minutes of easy bouldering, followed by 25 burpees at a moderate pace. Then do 20 TGUs (Turkish Get Ups) with appropriate weight (10/side), 10 dips (bench, rack, or ring depending on your strength), and another 8–12 pull-ups. Finally, it is wise to complete a little shoulder mobility work; cick the link for a video tutorial.
Lock-Off Workout
Pull up into a lock-off position. I prefer to use one ice tool, doing a pull-up with one hand on the top grip and my locking-off hand on the bottom (large) grip. Have a clock or timer in view. Let go with the upper hand completely. Hold the one-arm lock-off for 12 seconds, or until you start to shake. When you start to shake, put your free hand back on the ice tool and lower yourself back down.
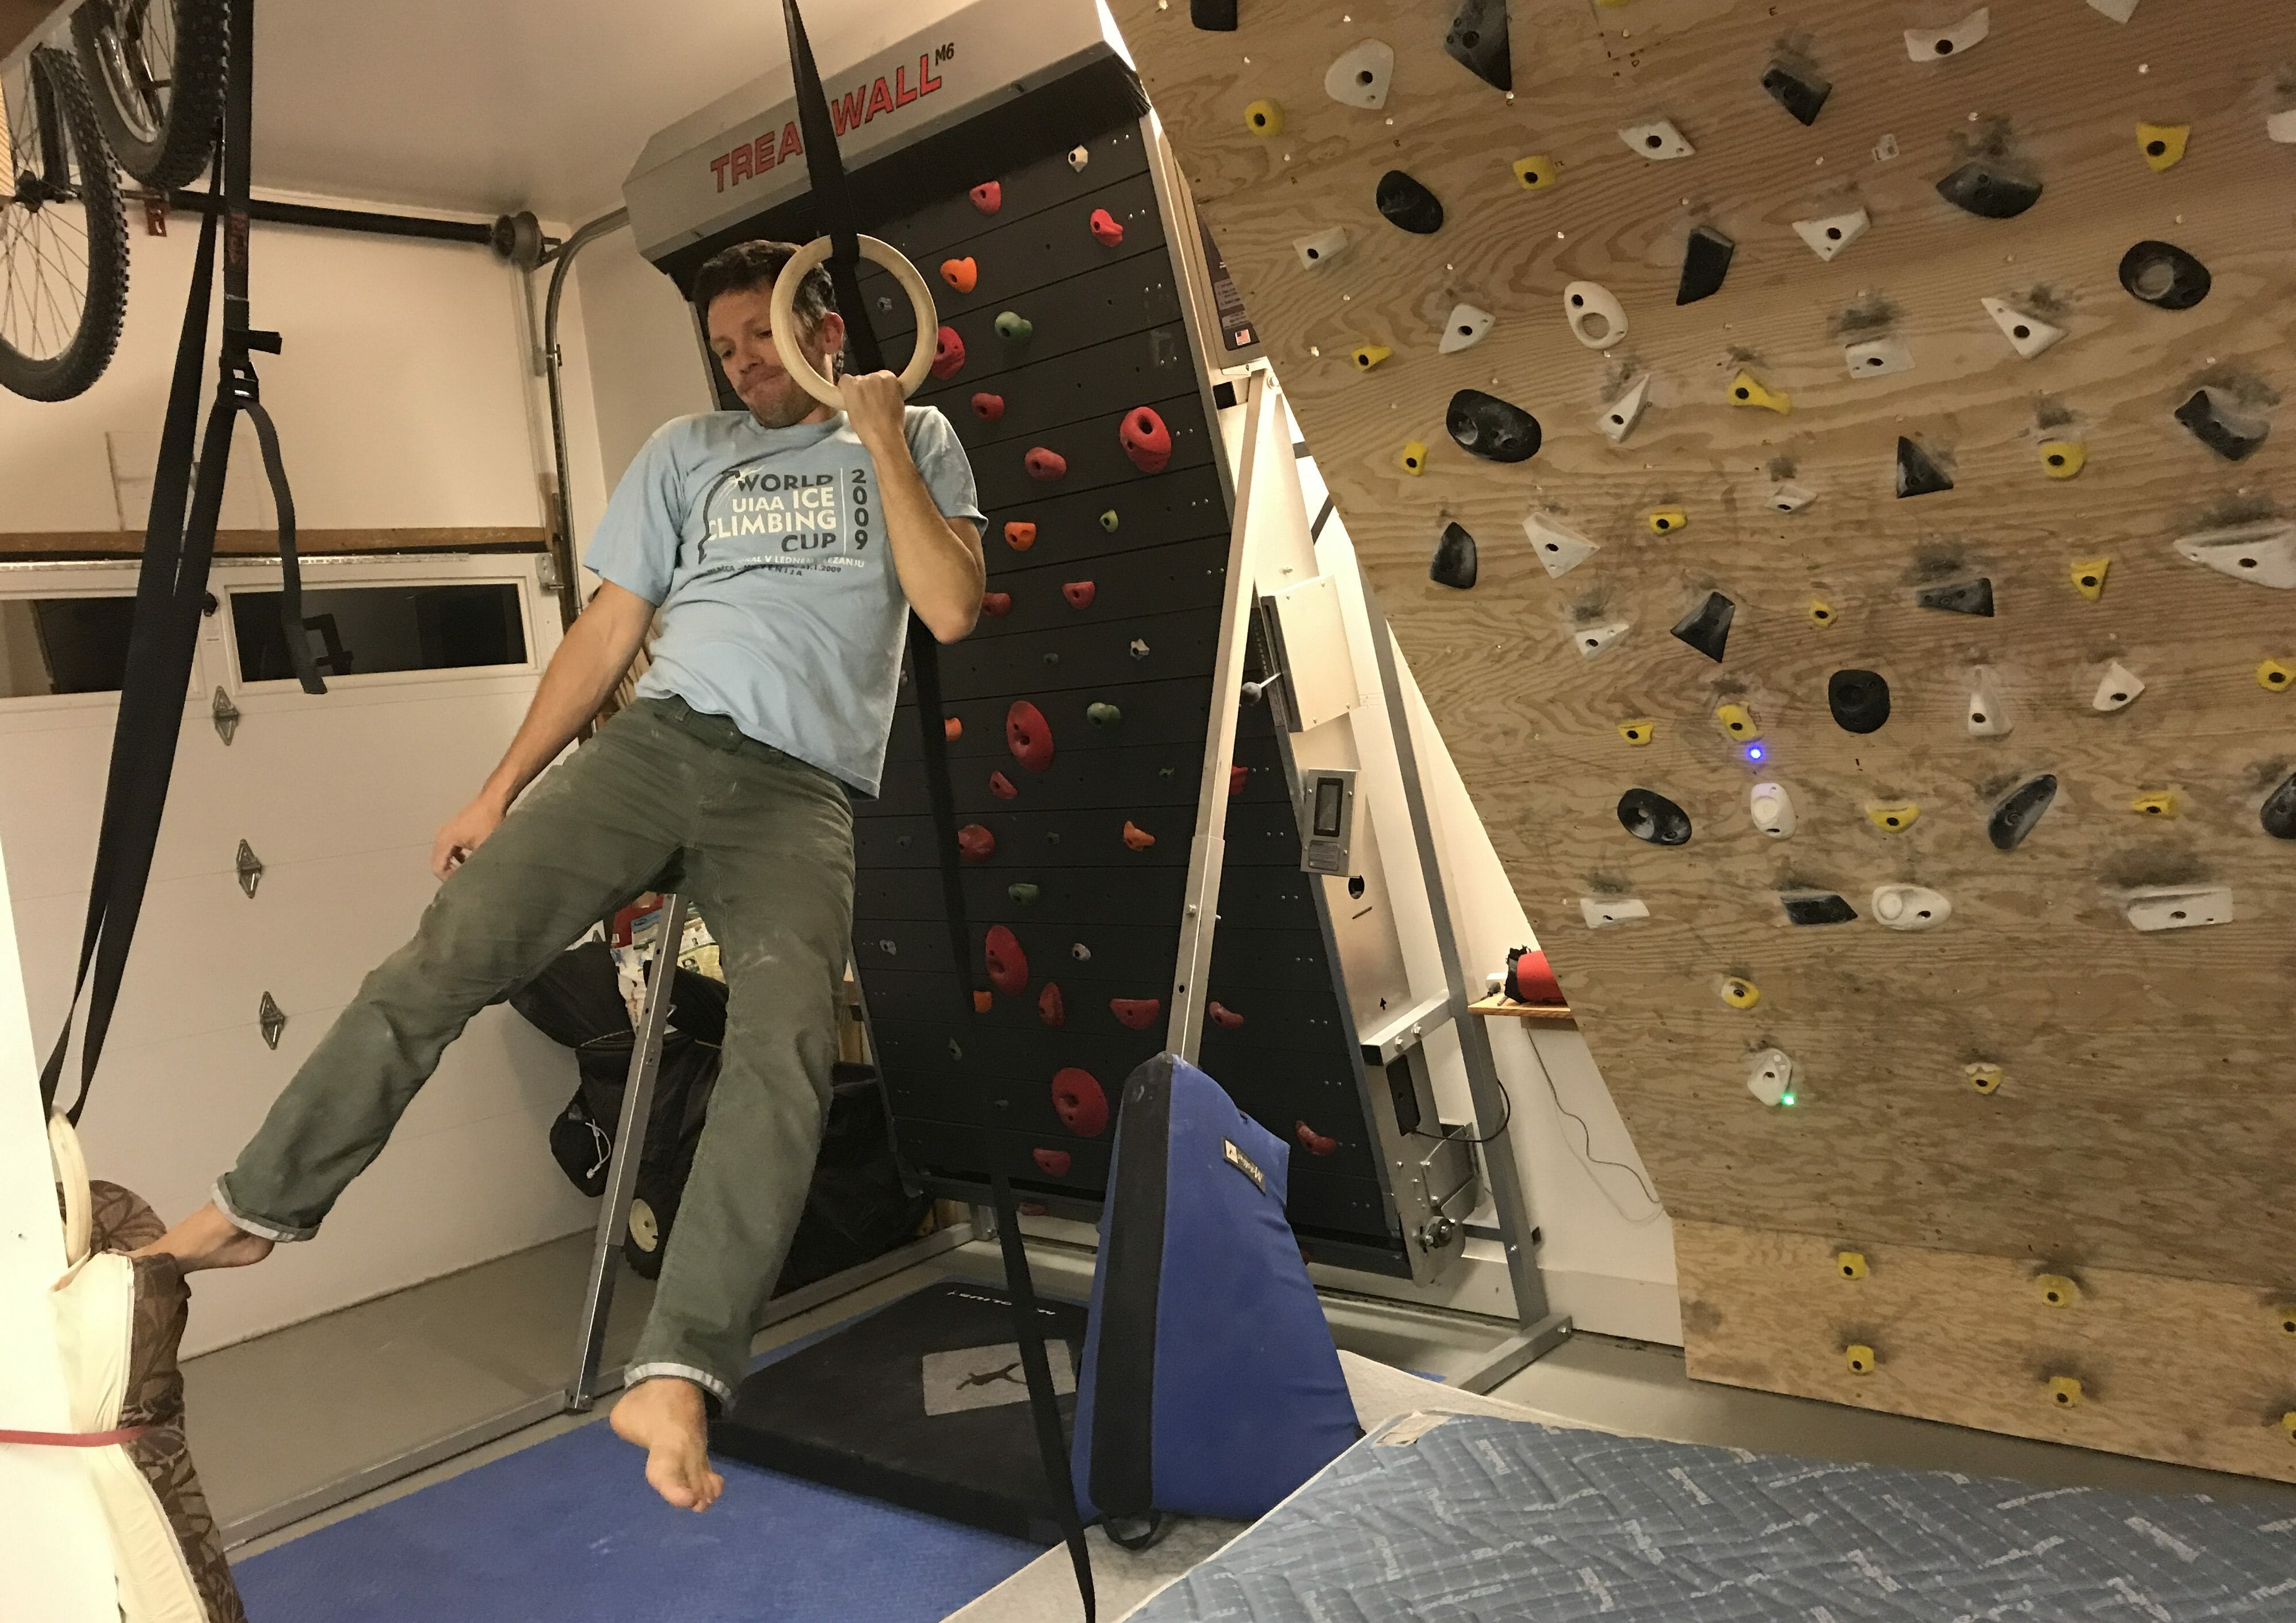
NOTE: If you can’t hold a lock-off at all, then place a support in front of you that you can toe into with the toe of the opposite foot to the arm you’re locking off with (see photo of Andres below for a demonstration). This can be a bench, chair, hold on a climbing wall, anything. If a support is not enough support, then do this with both hands, either one above the other as on an ice tool (see photo of Steve below), or with both hands even, as on a set of gymnastic rings or a pull-up bar (palms facing away).
Now switch hands so the opposite hand is on the opposite grip on your ice tool. Pull up into a lock-off position and drop the upper hand to your side. Hold on that side for 12 seconds or until you start to shake.
Lock-Off Workout Summary
Hold 12 seconds per side. 1 minute rest. 6 rounds or until you start to shake within 6 seconds.
Rest 5 minutes.
Hold 8 seconds per side. 1 minute rest. 6 rounds or until you start to shake within 4 seconds.
Rest 5 minutes.
Hold 4 seconds per side holding a weight if necessary to elicit shaking within four seconds. 1 minute rest. 6 rounds or until you start to shake immediately without any weight.
Repeat the above workout as part of a larger ice climbing strength training routine, usually twice per week. Happy climbing and let us know how it works out! #weareuphillathlete or coach@uphillathlete.com.
-by Steve House, Uphill Athlete co-founder