Calves burning, hips locked in hard against the ice, one arm locked off low as I swing an ice tool high overhead. I have trained for ice climbing since the first season I discovered it way back in 1988—training that has taken me to some of the wildest places on our planet. Ice and mixed climbing are core skills to alpine climbing, and fun in their own right. Before jumping into ice climbing training (and mixed climbing training), it helps to know what is involved physically.
The quintessential ice climbing movement taxes the calf muscles, the shoulder girdle muscles, the triceps, and the forearms in particular. Your core must be strong in extension and in convex and concave positions. You have to be able to pull your knees up—sometimes close to your chest—while wearing heavy boots and crampons. You have to be able to stem out laterally with your feet. And last but not least, vertical ice demands you pull yourself up with your arms over and over again.
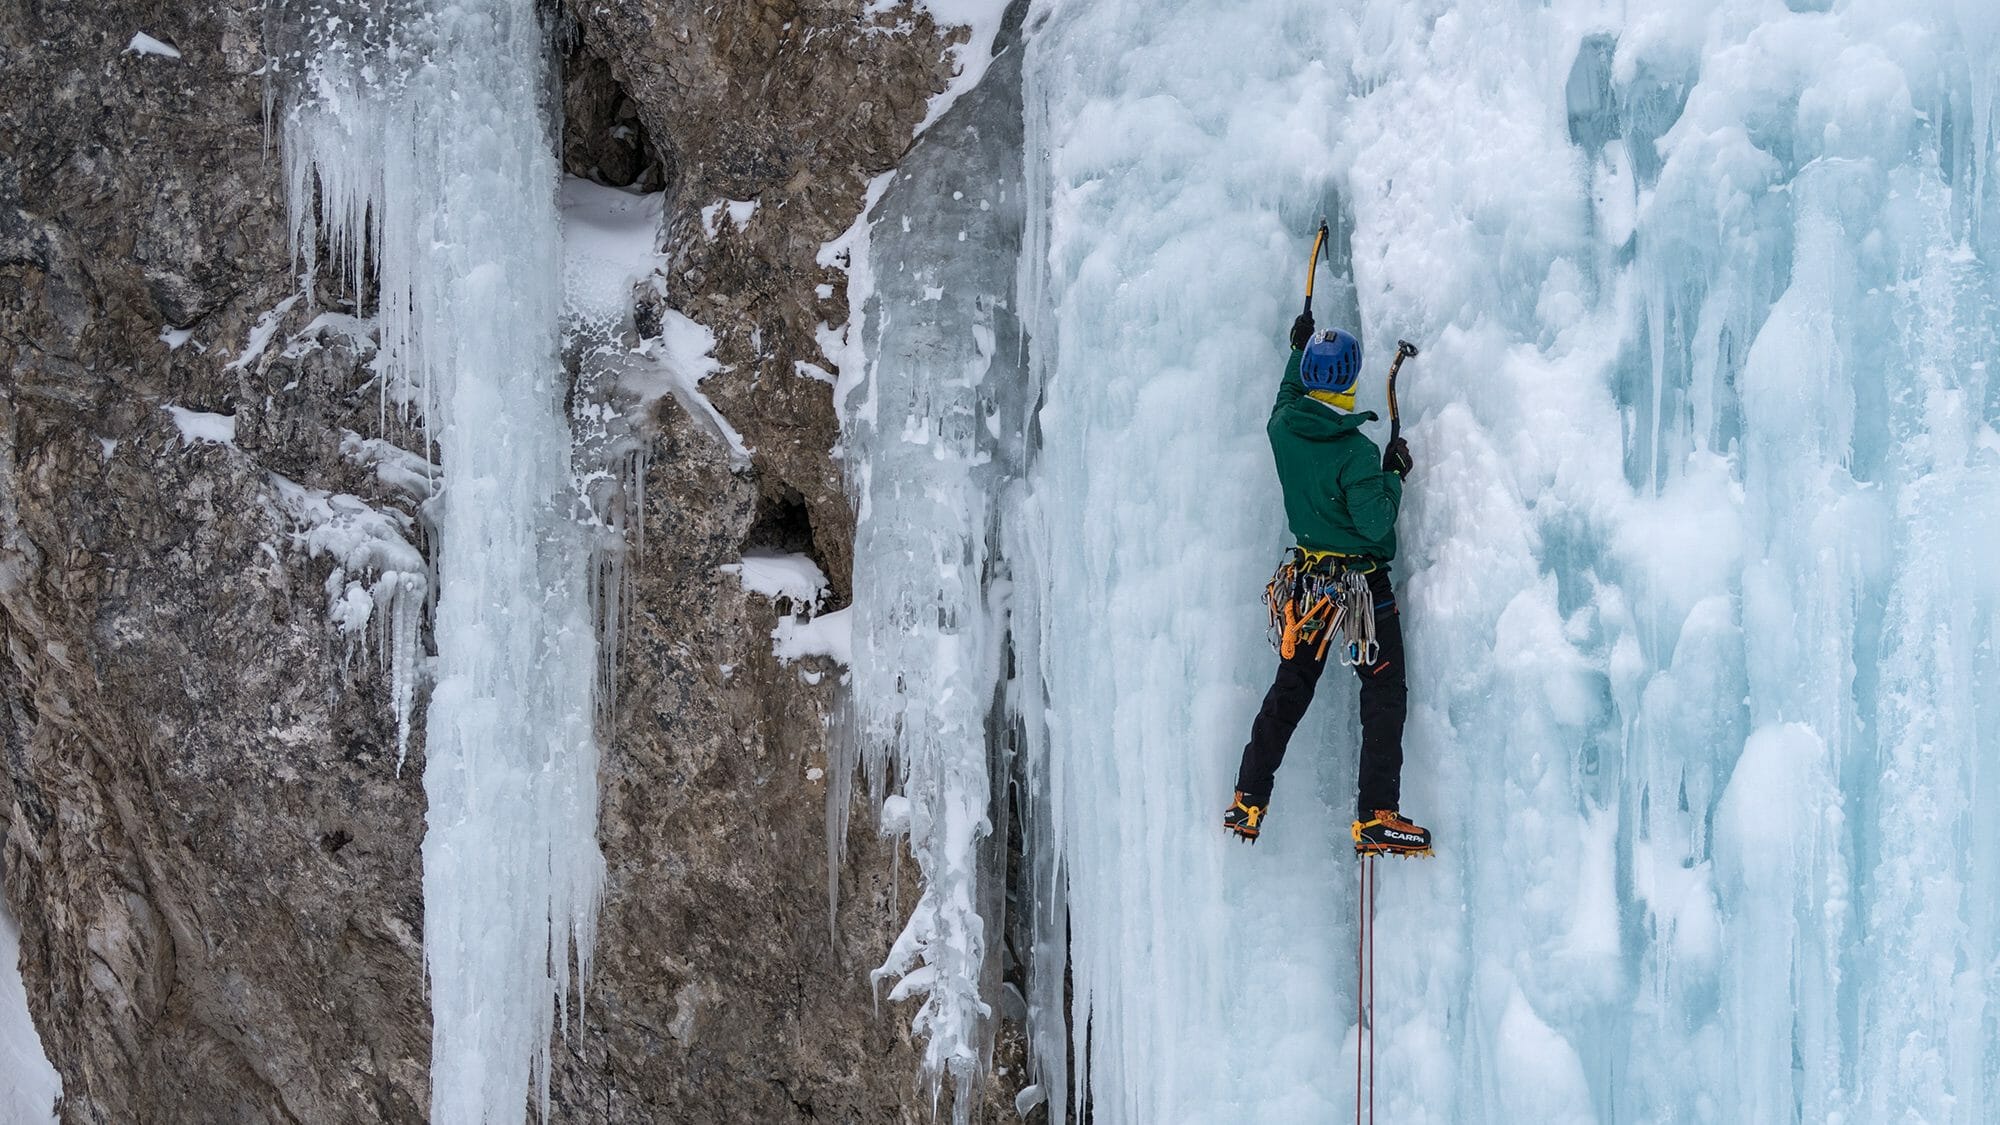
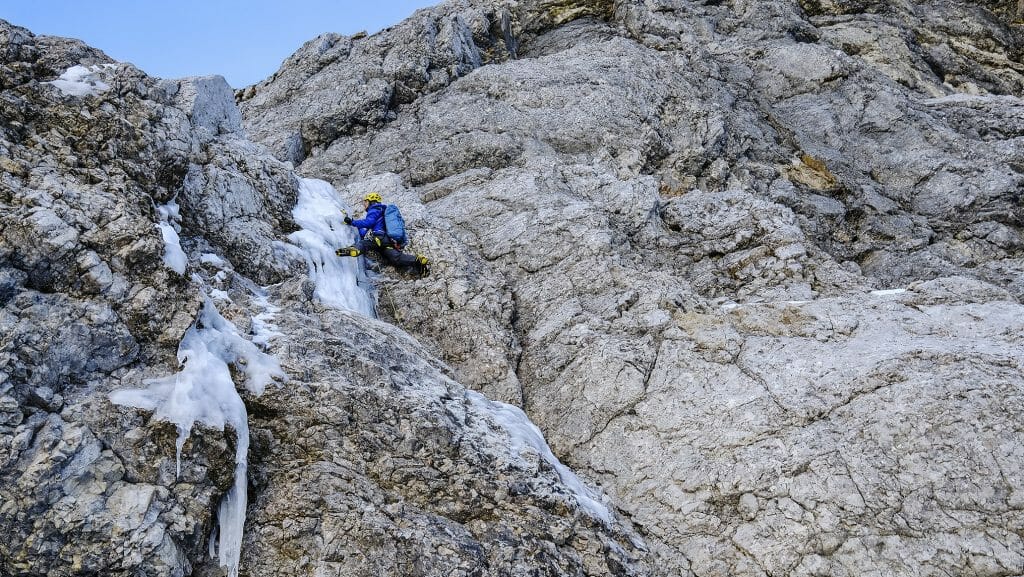
Mixed climbing—climbing rock interspersed with ice—is especially common in alpine climbing and attracts a small subset of recreational and professional mixed climbers (yes, there is a World Cup series for ice/mixed climbers!). This terrain, especially at the crag, can become very steep, and the physical demands are akin to steep sport climbing. Long reaches, low one-armed lock-offs, and extended toes, as well as more unusual techniques such as dropped knees and Figure 4s and Figure 9s, make hard mixed climbing one of the most strength-intensive subspecialties of climbing.
What is the best way to train for ice climbing?
It all sounds complicated, and movement-wise there are many ways in which we can use our bodies to ascend steep ice and mixed terrain. But underlying it all is a certain basic level of strength. For this reason, ice and mixed climbing training is largely done in the weight room and climbing gym. There just isn’t much aerobic demand in this sport. The notable exception will be for people who would like to lose weight in order to optimize their climbing. If that is you, I recommend adding two to three aerobic workouts per week to increase your overall health and help you shed the weight.
How Long Does It Take to Get Strong?
The answer to this depends on how high you set your expectations. If you wish to be the very best you can be, the timeline will be many years, probably more than a decade, of purposeful, smart training. This is how the world’s best become the world’s best. Training trumps talent every time.
I recommend that people train for at least eight weeks. A two- or four-week plan is good if that is what you can wrap your head around, but most people won’t see much progress in that time frame. So if we establish that eight weeks is a good minimum block for producing meaningful results, then let me tell you that the more time you can dedicate to progressing, the more significant and bigger the gains you will see. I often ask people to adopt a 16-week time frame, and if they can do it, 24 weeks is even better.
The reasons behind these time frames lie in our human physiology and how we adapt to exercise and training stress. Training itself is described by a simple recipe: Apply a training stress followed by rest, then repeat, applying a slightly higher training stress, and do this over and over and over again. Because of our physiologies, we’re locked into this longer-is-better method: It takes a long time to go through enough of these stress, rest, repeat cycles to make gains.
The 3 Principles of Ice Climbing
Continuity means to train without break. This is not to say that we should train constantly, or even daily. No, that would surely lead to injury. Continuity means to time each subsequent training session so that it corresponds to the period when you are fully recovered—supercompensated, to use the coach’s term—from the last training session.
Gradualness means that you need to, from workout to workout or week to week, gradually increase the training stress. Failure to increase the training stress will result in a plateau. Ramping up the training stress too fast will result first in stagnation, then in regression.
Modulation means varying the training stress from hard to easy. This will be both on a day-to-day cycle or a week-to-week cycle. Correct modulation gives your body a chance to absorb the previous stress.
It is the careful combination of these three elements that best enables long-term gains.
Strength
The strength needed for climbing ice and mixed terrain can be broken down into two key components: core strength and upper-body strength.
Core strength is, if you think about climbing movements, incredibly important. But oversimplified Fitness Blender–style workouts are rarely useful for more than helping you do something (where anything is better than nothing). P90X, for example, is muscular endurance training misunderstood and misused. Core training, like all training, needs to follow the principles of continuity between workouts, a gradual increase in challenge, and modulation.
Upper-body strength, pulling yourself up and holding yourself up, is the most obviously important aspect of ice climbing fitness. Besides the required continuity between workouts, gradual increase in challenge, and stress modulation, you need to do two things: First, develop a high level of maximal strength in your arms and shoulders. Second, develop endurance in a strength-sense of the word. At Uphill Athlete, we call this muscular endurance; other authors and coaches may use a different term, such as strength endurance.
Developing both core and upper-body strength isn’t that difficult, but it requires tackling the process in the correct order. Too many people—including a younger me—start with muscular endurance. I originally thought that ice climbing training simply consisted of doing loads of pull-ups. I would do as many as I could in a day, then I’d repeat that again in a few days once the soreness had started to wear off. It is a common approach—and a backwards one. The reality is that there are three key phases to strength development.
The 3 Phases of Strength Development
Phase 1: Conditioning
This is a crucial stage and one of the hardest. The workouts are fairly long, containing a lot of sets and reps. It can be difficult to stay motivated for the necessary four to eight weeks of this training because the gains are not obvious. Gains come fast and furious in the next two stages, but if you skip step one you stand a good chance of getting injured and derailing the whole process.
I like to say that climbing injuries aren’t caused by overuse, they’re caused primarily by ignorance (and secondarily by hubris). Every athlete needs to return to fundamental conditioning work at least once a year. The highest-level professionals do this, and you should too. Failing to recognize this fact results in injuries. To put it another way, there is no such thing as overtraining, only underrecovering.
Phase 2: Maximum Strength Development
These workouts are fun, quick to do, and you see clear gains from week to week. Everyone loves this stage. The basic principle behind max strength sessions is to teach your nervous system how to fire more muscle fibers together, in concert, to produce more power. Or to put it another way, this is training your muscles to “wire together to fire together.”
Phase 3: Muscular Endurance
This is what many of the current fitness fad workouts consist of because this training feels hard and fun, and the gains are fast and noticeable—until you reach the limit of your physical potential, which, by no coincidence, is either what you show up with or what you built in phases 1 and 2.
If you go through phases 1 and 2, your physical limits will progress much farther than if you skip straight to the muscular endurance workouts.
The good news is that you can cycle back and forth between phases 2 and 3 several times before needing to go back and address the fundamental conditioning of phase 1. That means you can cycle max strength periods and muscular endurance periods for 32–40 weeks. After that you’ll have to taper and enter a performance phase.
Big Enough to Be Strong Enough
One important caveat is for those who need to put on muscle mass (most commonly teenagers and older athletes who have become de-trained). These individuals simply don’t carry enough muscle mass to be strong enough for their activity; no matter how much strength the muscle fibers develop, there aren’t enough fibers. In this case, a muscle-mass-building cycle, also known as hypertrophy, is in order. These cycles are simple to plan and execute as they involve lifting or pulling heavy weights for enough reps to reach muscular failure (usually 8–12). This is so simple, in fact, that it’s why a lot of people who don’t understand the concept of hypertrophy inadvertently get bigger than is optimal for their sport. Climbers have to carry all those heavy muscle fibers around, so we want to keep them to a minimum.
Power to the People
Let’s walk through it now and get down to specifics, because I know you want a workout to do. In the following sections I drill into those three crucial strength phases and how you should progress through them to maximize your ice and mixed climbing fitness.
Phase 1: Conditioning or Transition
This first phase, the Conditioning or Transition Period, encompasses core work, general strength training, and climbing. It should constitute the first eight weeks of your training, no matter how many weeks you have until you want to peak.
Core Training for Ice Climbing
Do the 10 Killer Core exercises as described in Training for the New Alpinism. Start with one time through. Each week, add a lap and drop any exercises that become easy and/or add resistance to keep them challenging. Do each core movement 10 times or 5 times per side.
General Strength
Start with one lap of the following circuit, doing the exercises as ordered. Do 10 reps of each exercise.
- Do this workout twice a week with at least two days in between.
- Every second week, add a lap to the circuit.
- In weeks 4, 6, and 8, increase weight and drop reps by two for each exercise.
- Turkish Get Ups
- Pull-ups
- Split Squats
- Incline Pull-ups
- Toe Raises. Wear boots and stand on a step or block. Most people will need to add weight to make this effective. The ideal weight would allow you to do 20–25 reps before failure; you’re only doing 10–12. Reps are per leg.
- Hanging Leg Raises
- Dips. Bench or bar dips, depending on your strength level.
- Ice Axe Hangs. These are two-tool, 10-second hangs. Simply hook your ice tools on something and hang there. Once you can easily hang for 20 seconds, add weight with a weight vest or by hanging weight off a climbing harness. Use enough weight that you can only hang a max of 12–15 seconds. Keep your shoulders activated and tense throughout the hang—never hang totally relaxed on your shoulder joints when training. Note: Either wear gloves or pull a sock over the shaft of each ice tool and tape it at the top. This is much more comfortable on the hands.
Climbing Days
During this phase you will also be climbing—ideally outside, but a climbing gym may be substituted.
If you’re under 25 years old, do the above gym-based strength workout on Tuesdays and Thursdays and rock climb both Saturday and Sunday. You can reorganize that schedule to climb on weekdays as well, just respect the minimum one day off in between the two workouts and two climbing days.
If you’re over 25, you probably can’t recover quickly enough to fit in four strength workouts per week. The only likely exceptions to this are that you’re essentially climbing full-time or you’re coming off of some other longer-term athletic career. For most people this means two gym-based strength training days plus one climbing day per week. If you need or want to train or exercise more often than that, add aerobic workouts, 90 percent at low intensity, on the other days of the week.
Age aside, everyone needs at least one full rest day per week. Keep in mind that manual labor, and I would include most forms of climbing guiding in this category, is not restful and does not count as rest.
A Smart Approach
During this period, your rock climbing days should be focused on volume. For the best results, don’t randomly approach this as “just going climbing.” Here are some ways in which an intelligent athlete can structure climbing days:
- Increase the volume of climbing, easily measured by pitches or vertical feet/meters, by 5 to 10 percent (maximum) each week.
- Focus on volume of pitches, not difficulty of pitches. Do not get tempted onto harder lines. The climbing days are suggested to be back-to-back for this reason. Here you can read about why training power/strength in the same session is (usually) a bad idea.
- Search out a style of rock climbing that mimics the style of ice/mixed climbing that you’re training for. If you’re training for Polar Circus, the Canadian mega-classic, then most of your climbing needs to be on less-than-vertical rock. If you want to crack the podium on the ice climbing World Cup circuit, you need to focus on overhanging rock climbing.
- Don’t take this specificity idea too far just yet. The ice climbing World Cup aspirant should not (yet) worry about what style of overhanging climbing they seek out. They need it all: dynamic one-move cruxes, multimove endurance, and power-endurance.
Sample Progression
Here is a sample of how to build volume, based on pitches, over an eight-week period:
Week 1: 5 pitches
Week 2: 6–7 pitches
Week 3: 7–8 pitches
Week 4: 5 pitches (this is a planned easy week)
Week 5: 7–8 pitches
Week 6: 8–9 pitches
Week 7: 10–11 pitches
Week 8: 12–13 pitches
Sample Training Schedules
If you are under 25, here is your training schedule:
| Sunday | Monday | Tuesday | Wednesday | Thursday | Friday | Saturday |
| Climb | Off | Core and General Strength | Off | Core and General Strength | Off | Climb |
If you are over 25, here is your training schedule:
| Sunday | Monday | Tuesday | Wednesday | Thursday | Friday | Saturday |
| Off | Off | Core and General Strength | Off | Core and General Strength | Off | Climb |
Respect the Rest: It is important to respect the rest intervals between the workouts. You can move the training days around on the weekly calendar, but space the workouts as I have laid them out above.
Trust the Process: Remember what I said about motivation at the beginning of this article? For at least the first month, it won’t feel like you are doing that much training. But it adds up over time and you’ll begin to carry some fatigue.

Phase 2: Base Period
This period lasts as long as you have time for. It could be as short as four weeks, as long as 32 weeks. To get started, follow the max strength protocol detailed below.
Ice Climbing Max Strength Workout
Warm-up
Do a light warm-up of 10–15 minutes of aerobic exercise. If you want you can invent a little circuit of aerobic work, including some floor exercises such as burpees, some easy climbing, or whatever else you can imagine. It doesn’t matter as long as it is at a moderate pace and leaves you feeling bouncy and warm, typically with a light sweat.
Core Routine
Pick your four hardest core exercises from those exercises you’ve been doing. Do each of them for 10 seconds or to 4 reps, with a max of 6 reps (3 per side where applicable). Add resistance as needed to limit reps or your hold time. For example, if the hanging leg raise is one of your hardest core exercises (it’s one of the best for ice climbers), then use it as one of the four. If you can do 12 reps without weight, then hold a weight between your feet or wear boots while doing the exercise to limit yourself to 4 reps (ideal). Do no more than 6 reps.
To summarize: Do four core exercises of your choice, 1 set of 4 reps of each exercise.
Workout
First, a note on weight: The typical weight for any max strength protocol is 85–90 percent of your one-rep max (1RM). You can estimate your 1RM by doing a given exercise to failure with a weight you think you can handle for 4–12 reps. Then use a 1RM calculator such as this one. In that calculator you will enter the weight lifted and the number of repetitions done, and it will calculate your 1RM. Start with about 85–90 percent of that number for each of the exercises listed below.
This weight should allow you to do the exercises without reaching muscular failure or exhaustion. In fact, these workouts should leave you feeling somewhat exhilarated and should have a restorative effect. If you find any given week’s max strength workout to be draining, I recommend that you go back and repeat the previous week.
You will do the exercises as couplets. A couplet is a pair of two exercises. In this case I recommend you do one upper-body exercise and one for core. For example, you do the pull-ups, then switch to max tool hangs, then REST 3 MINUTES. Then you go back to the pull-ups and repeat as a couplet circuit until you’re done with all the prescribed reps. Then you move to the second couplet, in this case incline pull-ups and weighted hanging leg raises.
Couplet #1
Do 6 sets of 4 reps (6×4).
- Pull-ups
- Max Ice Axe Hangs
Couplet #2
Do 6 sets of 4 reps (6×4).
- Incline Pull-ups
- Weighted Hanging Leg Raises or, for the advanced, a Figure 4 Couplet
Couplet #3
Do 6 sets of 4 reps (6×4).
- Weighted Lock-offs. One arm at a time with a weight you can hold for 10 seconds, but hold only 6 seconds.
- Weighted Toe Raises
The Exercises Explained
Pull-ups
Do them on your ice tools if possible.
Incline Pull-ups
These are best done on gymnastic rings. I have also used a squat cage with the big bar set across the cage and my ice tool hooked over the bar. You can vary the difficulty of incline pull-ups by varying where you put your feet, the starting angle of your torso, and what you put your feet on (try a large ball for an additional challenge).
Ice Axe Hangs
Do 4 sets of one-armed, 10-second hangs. Use enough weight that you can only hang a max of 12–15 seconds. Rest 1 minute between hangs. Keep your shoulder activated and tense throughout the hang. Do not hang totally relaxed on your shoulder joint with this much load.
Weighted Hanging Leg Raises
Hang from your tools or the bar. Hook your toes into a kettle-bell, and lift your knees as high and tight to your chest as you can. You can also use ankle weights or wear boots.
Figure 4 Couplet
You can learn how to adapt this climbing movement to be a training exercise here. To add weight, if needed, simply hold a dumbbell in your free hand.
Weighted Lock-offs
Lock off on one tool and hang there, holding a dumbbell in your free hand.
Weighted Toe Raises
Put your climbing boots on (it is important to do this with a rigid-sole boot) and do this one leg at a time. It’s common for one side to be significantly stronger than the other.
For more details on how to correctly progress through a max strength training plan, consult Training for the New Alpinism or our Ice and Mixed Climbing Training Plans.
For another eight weeks, add this workout into your program once every 10 days. This is a difficult, and also very powerful, workout. Do not overuse this, as you’ll end up sick and/or injured without sufficient rest. Note that you should not cycle through more than two muscular endurance periods. During a muscular endurance period, I recommend the following schedule:
| Sunday | Monday | Tuesday | Wednesday | Thursday | Friday | Saturday |
| Climb | Rest | Rest | Ice-Beast Workout | Rest | Rest | Climb |
Phase 3: Muscular Endurance Period
Ice-Beast Muscular Endurance Workout
Warm-up #1
Start with a 10-minute warm-up run followed by 5 minutes of dynamic stretches of your creation. Dynamic stretches simply mean moving your joints and limbs through their full range of motion. Be creative.
Warm-up #2
Do two cycles through the following exercises at a steady pace. Rest about 30 seconds between each exercise.
- 6–10 pull-ups
- 10 burpees
- 10 TGUs (Turkish Get Ups) per side with 22 pounds (10 kg), or an appropriate weight that still allows good form
- 6–10 pull-ups
Rest 3 minutes before starting the workout.
Workout
Pace yourself through the following routine. The idea is not to do this as fast as you can but to maintain quality and form throughout each movement. The training effect comes from the volume of work done, so if you blow up halfway through by going too hard, you will not get the desired endurance effect.
Hanging Leg Raises x 60 seconds. As many as you can do in 1 minute.
Recover 30 seconds.
Static Lock-off x 60 seconds. Hang on your ice tools with your chin as high as you can manage for 60 seconds. Two-armed for most or one-armed for the advanced.
Recover 30 seconds.
Hanging Windshield Wiper x 5 each side. If this is too hard, do a weighted windshield wiper (wear boots or grip a soft weight, like a small medicine ball, between your feet).
Recover 30 seconds.
Pull-ups x 20. Drop off as needed to complete 20.
Recover 30 seconds.
Grip Strength x 60 seconds. Grip only the shafts of your ice tools, without support from the handle. Hook the weight(s) with your ice tools (kettle bells work best) and hold that weight for 1 minute. Use good lifting posture: back straight, shoulders shrugged up toward the ears, and arms active, with the weighted tools hanging to your sides. The weight should be heavy enough that you could hold it for about 90 seconds. To decrease the difficulty, use the grips of the ice tools.
Recover 30 seconds.
Incline Pull-ups x 60 seconds. As many as you can do in 1 minute.
Recover 30 seconds.
Rest 3 minutes, then repeat each exercise one more time for a total of two rounds. Rest another 3 minutes before each additional round.
Do your reps at roughly a 1-to-2-second tempo, except for the pull-ups, which are slower. Set a pace that allows you to make it all the way through.
Ice-Beast Progression
To progress the Ice-Beast Workout, add rounds per the following schedule:
Weeks 1 and 2: 2 rounds
Weeks 3 and 4: 3 rounds
Weeks 5 and 6: 4 rounds
Weeks 7 and 8: 5 rounds
Summary
Training is not randomized exercise, nor is “just going climbing” going to allow you to improve (unless your technique is the primary limitation in your climbing). Training is a strategic process, and it absolutely works! This outline, and the workouts set forth, will put you on your way to your strongest ice and mixed climbing season yet.
The workouts I share here are ones that I have been developing—primarily on myself, but also with all our ice and alpine climbing Uphill Athletes—over many years. They work like a puzzle. Each workout is just one piece of the big picture of the best shape of your life.