Winter is coming—are you ready for the ski season? Make sure you’re as fit for the skin up as the ride down by following a focused, ski-specific strength and conditioning cycle. In this article on preseason ski training, learn how to:
- Move from summer activities to ski-oriented training
- Incorporate key core exercises
- Build functional leg strength and muscular endurance
- Introduce higher-intensity Zone 3 workouts
- Button it all up with the proper knowledge and gear
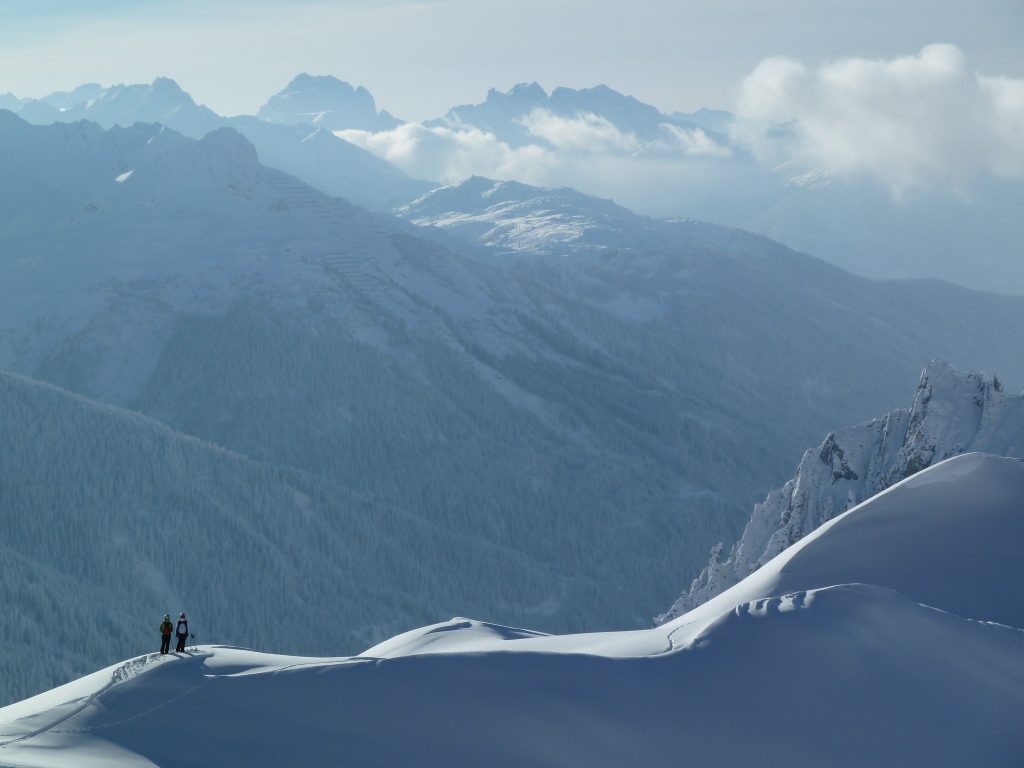
As the aspen leaves outside my window begin to change color, and the tips of larches in the mountains start to transition from a lush green to golden yellow, my excitement for the upcoming winter builds. I linger beside the ski rack in my garage, where the sticks have hung for several months untouched, checking edges and p-tex dings from past seasons, wondering if now is the time to start base-prepping them for the turns to come. Yes, friends—ski season is nigh upon us!
Well, almost. A few months of fall remain in most winter-sport-friendly locales, and that means it’s the perfect time to examine your training and start to shift into some specific work for the ski year. Are you an avid tourer/ski mountaineer, or are you inspired to put on a race bib and toe the line at an ever-more-popular skimo race? Maybe you’re a fitness lapper in the pre-lift hours of your local area? Despite the myriad ways to experience skiing mountains, there are commonalities to training for each discipline. And it is exactly this training that will prepare you to enjoy the season with confidence, avoid injuries, and make your ski partners dig just a bit deeper to keep pace as the day stretches on.
This article will help you tailor your training to the coming ski days: learn how to build strength, develop aerobic (and anaerobic) capacities, and maximize your local resources to make the best training happen. To begin, I’ll briefly touch on the components of successfully transitioning your training from the summer months of hiking, running, biking, etc., into more ski-specific workloads.
Moving from General to Specific Activities
Whether you’ve been logging miles running or backpacking, or spinning a high cadence on pavement and narrow singletrack on a bike, when you begin thinking about the ski season the first thing to consider is how specifically your body has been moving vis-à-vis skinning on skis or a splitboard. Running and hiking, being foot-borne, more closely mimic the demands of skinning uphill than do biking or rowing, which are both non-weight-bearing and done in a seated position. However, no dryland training will perfectly prepare you for skiing. It’s important to consider these differences and how you can start to move closer to simulating the touring motion.
Running is a great all-round tool for building fitness and maintaining functional strength. When you want to start moving your running training toward ski training, look to adding more vertical gain to your days. Do not be afraid to switch to power-hiking with a quick cadence to mimic the turnover and stride in a skin track. If you’re aiming to do some skimo racing, it’s also good to include even faster cadence work and moose-hoofing sessions. (Take a look at page 313 of our book Training for the Uphill Athlete for information on dryland ski simulation methods. You might also want to check out this short video on the same subject.) If you watch successful racers, they utilize a high turnover in the skin track, especially in steep terrain, staying on top of their skis and maximizing the grip of their skins without blowing out the kick behind them.
In these more vertically oriented training sessions, start bringing trekking poles (or just your winter ski poles) to add the arms and regain that synergy of arm and leg cadence in concert. Believe it or not, if you’ve been running or biking all summer without much upper-body work, the first few days using poles in a steep skin track will generate some soreness.
If you have spent much of the summer months on a bike, now is the time to start getting on your feet again. Your leg muscles need to feel the impact of the ground in order to build the strength to not only tour uphill but sustain the repeated squat impacts of many thousands of feet of descent. You don’t need to (nor should you) move directly into running miles if they haven’t been a part of your diet; you can instead find a local hill and begin hiking with poles as described above. No hill? Try a treadmill at 15+ percent grade. No treadmill? Even brisk hiking on mellow/flat terrain with poles and a small pack will be a good way to introduce the load to your body. And with all that said, if you have maintained a running base in addition to your cycling, running will always provide a good method to firm up impact resistance in your lower limbs.
Once you’ve gotten a few weeks of transition activity under your belt, consider adding a small pack to mimic your standard day-tour pack, perhaps 10–15 pounds total. Again, think specificity. You don’t want your first day with a pack or poles to be your first tour of the year; get your body prepped in advance so it feels natural and familiar when you step into (or set) the first skinner of the season.
Strong Like Bull
Sure, we harp on strength training all the time. That’s because what rock climbing legend Tony Yaniro said—“Without strength, you have nothing to endure”—is true for any activity. If you’ve been neglecting focused strength workouts all year (you’re not alone), now is the time to make peace with the kettlebells and pull-up bar. Below I’ll dive into more detail on how you can structure and periodize your strength training to get you fit as a really burly fiddle for the season, but in this interim time it’s important to prepare your body for that work. If you’re an active yogi, then you’re partway there; maintaining good mobility is a great foundation for building strength. Not into bend sessions on a soft mat? Start doing a daily routine of basic stretches and poses; check out this video for an easy 10-minute session you can follow to limber up.
If you’ve been remiss in maintaining your strength training program because you were outdoors running around in the mountains or climbing all summer, you should do a few weeks of conditioning to make sure your joints and tendons are up to the task of carrying more weight … before you commence hefting the iron and blasting The Sword’s classic crash-bang metal song “Freya” (a UA favorite) into your dome. Here is a short rundown of functional movement exercises to employ twice weekly in a circuit to prepare your body for the work to come. Use a weight/resistance that is in the range of 50–60 percent of your one-rep max. Do 8–12 reps per limb in each set and move without rest from one exercise to the next.
- Single-leg forward Ts (also called the single-leg Romanian deadlift)
- Lateral lunges
- Box step-ups and step-downs
- Shoulder flys, frontal and sagittal planes
- Sagittal (front-to-back) leg swings, add a hop
- Squat jumps, 60 percent force
- Compass hops, single leg
Strength Training Progression for Skiing
While running, biking, and climbing in the mountains provide certain strength elements that can help you maintain a good base of strength, they’re not always enough. Especially when you’re looking to transition from one season or sport to the next, it’s important to evaluate your weak spots or those components that haven’t seen the same emphasis in prior months. Because skiing—both touring uphill and especially descending—involves a tremendous, repetitive load on the lower body in a manner somewhat different from either seated biking or high-cadence running, let’s consider how to train those muscles for the specific task.
Phase I: Foundation and Core
The first step to any strength progression should be establishing good movement patterns that tend toward durability and range of motion at key joints. Equally important is solidifying your core, particularly the transverse abdominus and internal and external obliques. Start with two strength sessions per week, employing exercises that focus on these areas. For example:
Session #1: Foundation and Mobility
Warm-up: 15 minutes of easy aerobic activity
Part 1: Core
- Complete 2 circuits of 12 repetitions (or a 30-45 second hold for isometrics like plank) of the following exercises.
- Add weight as needed to make each set challenging but doable with good form.
Windshield wipers
Push-ups
Kayakers
Turkish Get Ups
Front plank
Bird dog
Strict sit-ups
Hanging knee/leg raises
Watch this video demonstration of Scott’s Killer Core Routine to learn how to do these exercises.
Part 2: Functional Movement
- Complete 3 circuits of 12 repetitions of each exercise (per foot, where applicable).
- Add weight as needed to make each set challenging but doable with good form.
Box step-ups
Air squats
Single-leg Romanian deadlifts
Forward lunges with twist
Lateral squats
Shoulder flys, frontal and sagittal planes
Reverse lunges with twist
3. Cool down with 10–15 minutes of easy aerobic activity.
Session #2: Core Foundation
Warm-up: 15 minutes of running, hiking, or biking at easy effort
- Complete 3 circuits of 12 repetitions (or a 45-60 second hold for isometrics like plank) of the following exercises:
Windshield wipers
Push-ups
Kayakers
Turkish Get Ups
Front plank
Bird dog
Strict sit-ups
Hanging knee/leg raises
2. Cool down with 10–15 minutes of easy aerobic activity.
As you can tell, this first progression of exercises in both cases involves pretty straightforward work. The goal is to establish stability, mobility, and functional strength in key areas before you increase the load later on. Remember to add weight to all these exercises as you progress them, as the next iteration of workouts will involve moving larger loads, for which you’ll want to have good form and basic strength.
Between these workouts you should be doing regular aerobic sessions to apply this burgeoning strength to ski-specific movements, such as uphill hiking or ski imitation drills, trail running, etc.
Phase II: Max Strength and Explosive Work
Get yer dynamite because it’s explosion time. This next stage of strength incorporates max efforts in the gym setting, combined later in the week with specific plyometric movements outdoors on steep hills. It builds on the functional foundation you’ve established by recruiting more of the available motor units in the working muscles to do the specific work. This increases your “pool” of resources for skiing and further develops crucial durability to prevent injury. That said, it’s critically important you DO the functional work preceding these workouts, and be closely attentive to how your body is feeling when embarking upon them. These more explosive exercises can lead to injury if the body isn’t ready for them.
Session #1: Max Strength in Gym
Warm-up: 15 minutes of easy aerobic activity
Part 1: Core
- Complete 2 circuits of 12 repetitions (or 45-60 second hold for isometrics like plank) of the following exercises.
- Add weight as needed to make each set challenging but doable with good form.
Windshield wipers
Push-ups
Kayakers
Turkish Get Ups
Front plank
Bird dog
Strict sit-ups
Hanging knee/leg raises
Part 2: Max Strength
- Complete 4 sets of 5 repetitions of each exercise, circuit-style.
- Employ as much weight as you can manage with excellent form.
- Rest at least 2 minutes between exercises.
Box step-ups
Push-ups (use a weight plate on your back or a weight vest, as needed)
Romanian deadlift (two-legged)
Back squat
Pull-ups (if you cannot complete 5 full pull-ups, do 5×3-second lowers from chin-above-bar, with a 1-minute rest between lowers)
5. Cool down with 10–15 minutes of easy aerobic activity.
Session #2: Hill Circuit—Explosive Power
For this workout you will use a short, very steep hill, ideally with good footing so you’re not slipping around and can apply force to the ground. Follow the entirety of the warm-up to ensure your muscles are ready for the exercises; shortcutting this portion can result in injury!
Warm up with 15 minutes of light aerobic activity, ideally running, finishing at the base of your chosen hill.
Now do 3×20 seconds of light bounding, increasing the intensity each time from moderate to high through the course of the repeat. Rest 1 minute between each one.
WORKOUT: Take a 2-minute recovery between each repeat of each exercise. This recovery is supremely important because it allows the explosive fibers to recover and fire at maximal effort for each repeat.
- 3×6 frog hops: Stand with feet together, drop into a deep squat, then explode forward, seeking to jump as far up the hill as possible. Reposition and repeat for each jump.
- 3×6 single-leg jumps (each leg): Jump as far as possible on each leg for six jumps, then switch.
- 4×12 seconds bounding: Maximal effort, using poles and trying to explode off each foot in a striding motion, seeking to bound as far as possible with each stride
Cool down with very easy running for 10–15 minutes.
Phase III: Muscular Endurance (ME)
Download this PDF for a complete ME workout progression.
After laying the groundwork for several weeks with the preceding sessions, it’s time to put all that foundational strength to use in a more specific manner. Enter muscular endurance. This form of strength is incredibly powerful in how applicable it is to mountain sports, but it also taxes the athlete and requires a strong base and careful recovery. Go into each ME session rested and well fueled, and monitor your recovery in the subsequent days, taking care not to overload your system while your body adapts to these sessions. For more information on ME, be sure to read this article. If there is a secret workout, this is it!
Each week should include:
Session #1: Muscular Endurance
Like many strength workouts, the exercise possibilities here are virtually unlimited—get creative and play around with different movement patterns and loads. There’s no magic formula! We have great success with this program with hundreds of athletes in all the mountain sports we coach, so you can feel confident that following this plan to the letter will help you regardless of your level. While the plan progresses for 12 weeks, you are likely to see decent gains in at least 5–6 weeks. The most important guidance to follow is to start modestly: Applying too heavy of weights, or beginning the jumps too explosively, will result in agonizing soreness in the days to follow—or worse, an injured muscle.
Session #2: Hill Power Circuit
For this workout you should use a short, very steep hill. The surface should be firm and not too slippery as you’ll be putting down a lot of force and don’t want to slip. Most importantly, complete a very thorough warm-up before starting the exercises. If you feel any sort of twinges or tightness during them, stop the workout in order to prevent injury.
Warm up with 15 minutes of easy aerobic activity, ideally running or hiking, and finish at the base of your hill. Then do the following:
- 3×20 seconds light (75% explosiveness) bounds, or “moose hoofs,” with 90 seconds of rest
Circuit: Start with 2 circuits for your first workout (each should last around 4 minutes), and then add another round for the next session as you get more comfortable with it. The workout can be progressed by adding more circuits and (to an extent) increasing the duration of each “station.” Additionally, for more load you can wear a small weight vest—start with 10% of your body weight—during the circuit.
The overall intensity for the circuit should be around your anaerobic threshold (AnT), but allow your heart rate (HR) to come up naturally through the course of the circuit instead of trying to “peg” it from the beginning.
CIRCUIT:
- 20 seconds running
- 10 air squats
- 15 seconds bounding
- 15 In ’n’ Outs
- 20 seconds running
- 6 double-footed frog hops
- 10 seconds bounding
- 30-second tuck squat (hold)
- 30 seconds running
- Very easy jog down to bottom
- Recover 2 minutes before starting next circuit
Aerobic Training Progression for Ski Touring
It will come as no surprise to avid UA readers and athletes that the biggest bang for your buck in training comes through aerobic efforts: lots of time spent at or near your aerobic threshold (AeT, which can be determined through a heart rate drift test). Increasing the frequency and duration of these aerobic sessions will ensure you have a rock-solid base to build upon, supporting not only your longer efforts in the mountains but also the recovery that follows.
While ski touring itself involves many hours on your feet, the effort during tours can vary above and below AeT. One-to-two-hour runs, hikes, and the occasional bike ride will all put money in your aerobic bank, ensuring you have a broad base to spring from for those big days in the mountains.
Specificity: If you lack the ability or terrain to complete your midwinter aerobic workouts on skis, or if you’re training in the months preceding winter, consider ways in which you can shift the specificity of your aerobic sessions toward ski touring. Adding steeper vertical trails or even off-trail terrain, as well as using light trekking poles, will help engage those skiing muscles. Believe it or not, the arms get a pretty solid workout when skinning up even moderate skin tracks. It pays off down the road to start using a pair of running/trekking poles early on in the dryland season to prepare your arms for plunging through deep pow to top out on that ridge.
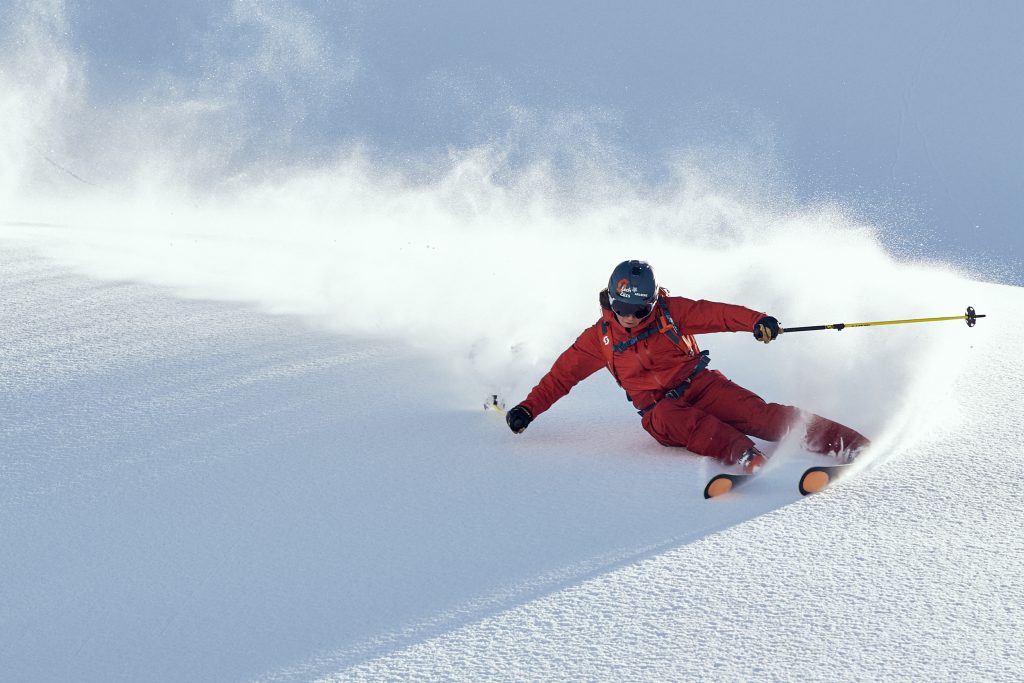
Downhill running, if your body allows it, can also provide a great training effect for skiing: the agility and quickness demands of running down a technical trail or off-trail terrain mimic the proprioceptive demands of a steep ski line, and the impact on your leg muscles will help toughen them for the countless turns and direction changes of a winter descent. Use caution when downhill running. This can lead to injury—not only to your knees but also to your head should you trip and do a Superman-type fall. If you are not experienced in mountain running, incorporate this into your routine very gradually.
Intensity: High-intensity aerobic/anaerobic training plays more of a supporting role to your overall preparations for ski touring than do lower-intensity aerobic loads. However, building a small regimen of moderate intensity into your training helps deliver a sport-specific muscular endurance punch. It also buffers your system against those times when you’re topping out a steep, waist-wallowing booter up a couloir or chasing the last line of the day and feeling totally gassed.
A great way to introduce some intensity into your diet is to employ Zone 3 (AnT) intervals after your first several weeks of exclusively aerobic (AeT or below) volume. For these Z3 sessions, use uphill terrain and employ poles for specificity. Start with one session per week and see if you can complete the workout and recover well enough to maintain the total weekly volume you were accustomed to; the goal is to sustain the load without having to drop hours to accommodate the new intensity.
Example Z3 Interval Session:
- Warm up with 15–20 minutes of easy running or ski walking, building up to AeT and finishing at the base of a long, sustained climb.
- Complete 2×2 minutes uphill at an effort trending upward through your low Z3, approaching AnT. Rest 1 minute between each repeat and return to the bottom of your climb at the end.
- Workout: Complete 4×5 minutes of uphill ski walking–to–moose hoofing at an effort as close to AnT as possible. Use the first interval to gradually ramp the heart rate up to AnT, not pegging a high effort from the outset as that may result in a blowup. Do 1-2 minutes of light walking recovery between repeats, essentially taking just enough time for your HR to recover back to Zone 1.
- Cool down with 10–15 minutes of very easy jogging (sub AeT).
Progress your Z3 intensity by increasing the duration of each repeat and/or the number of repeats. Build toward 3–4 intervals of 10–12 minutes apiece, again ensuring that you are able to recover well and maintain the volume and workouts during the rest of your week.
If you keep up this program for 8–12 weeks, you will almost certainly be well prepared for the ski season. That said, it’s always tempting to go out of the gate too hard on your first tours. Regardless of how well you train in the fall, skiing is still different from any form of dryland training and you will not be in your top condition until later in the winter—after you’ve logged many day tours. All the preseason training advice doled out above is meant to prepare you to start the season in a better place, not to put you in peak shape for those early December tours.
For the best season outcome, continue the program after you get on the snow. Gradually add volume (longer tours with more vert) and more Z3 intensity sessions. Continuing a gradual progression will allow you to build fitness though December and January and feel your best in February and March. Transitioning from a modest dryland program directly into a couple 10,000-foot days in December just because the stoke was high is a good way to be a “Christmas star”—you shine bright early, then your fitness and performance plateau or even decline by midseason. Play your cards right and give your body the time to adapt, and that February hut trip could see a week of back-to-back 10,000-foot days.
Bonus Content: Readying Your Quiver
Having tackled the physical preparations for a great season, you should hardly overlook the bits and pieces of gear that are essential to enjoying those days of shussing through that lovely cold smoke. Below is a *non-exhaustive* list you can follow now to be readying for the winter to come.
- Skis/Boots/Bindings/Poles: Take stock of your primary tools and their condition. Tune edges, wax bases, check and tighten binding screws. Test the fit of your boots; did you develop some funky feet after your monumental trail running season, and now those bitchin’ Alien RSs that carried you through countless days have an unbearable pressure point? Gear is expensive, but when you design and tune the engine with training, make sure it’s running on a quality frame.
- Avy Gear/Skills: Perhaps like no other season, the 2020/21 winter will see unprecedented numbers in the backcountry, owing to resort closures and limited lift access. The more prepared we are with avalanche equipment and skills, the more likely we are to manage risk properly and be able to respond effectively in an incident. Check the batteries in your transceiver, then brush up on beacon skills; everyone says it, but how many of us do it each fall? Gather a few friends in a Covid-friendly manner, hide a beacon or two in the woods, and get to work in coarse and fine searches, refreshing your patterns and (re)learning how your particular transceiver works. Multiple burials? Group modes? What about the other safety gear: How old is your shovel? When’s the last time you pulled that probe out of its sheath?
- What’s in the Pack: Food, water, insulation, first aid, emergency communicator … the list goes on. Take time and think about the tools and items you need to stay safe and responsive in the backcountry. Check out Wildsnow.com—a great resource featuring numerous articles on the topic.
- Be Informed: Approach your touring season the way you would your training: record what you do, how it went, and what you saw and experienced. Read (or reread) Bruce Tremper’s essential Staying Alive in Avalanche Terrain and familiarize yourself with your own zones. Follow the weather and avalanche forecasts and make observations and recordings to keep yourself up to date on how the snowpack is evolving. Take an avy course and, most importantly, find a mentor you can trust who will pass along their strategies of staying safe and riding well.
And after all that is done, the boxes checked, and the bindings clicked, drop in and enjoy the turns!
This article was originally published by Sam Naney.